Guide to Wiring the Solars
Written by Folia, transferred by Blukey.
Welcome to Engineering, scrub!
A good engineer will know how to set up the solars, when all else fails.
Getting Started
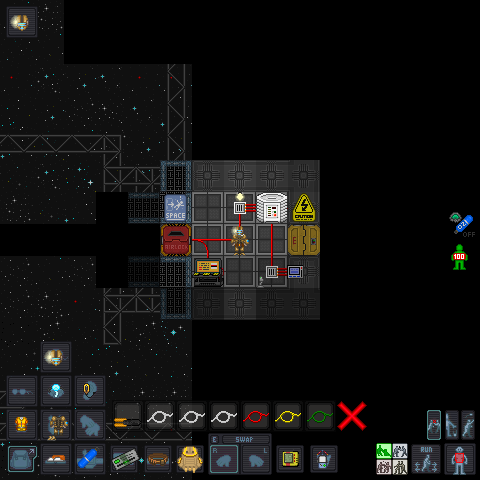
Here, we see we are equipped with our hardsuit gear, oxygen and breath mask, then our tools (from the toolbelt): a pair of wirecutters and plenty of cable cord.
Configuring the SMES
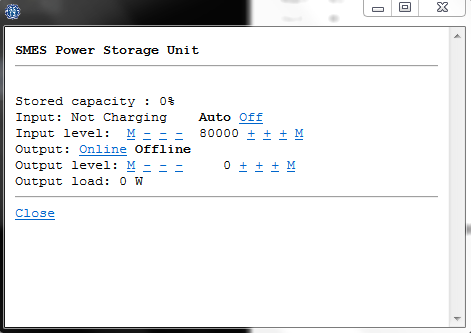
It is important that you configure the SMES as shown above, verbatim. The TG wiki explains why:
A common mistake is to immediately set the input to 90,000 watts (the amount produced by full sunlight) and the output to 80,000 watts.
 However, this will not work. Solar batteries (SMES cells) start at 20% power, but if the engine is off, the station drains them to 0%
 in a few minutes. An input of 90,000 watts (full sun) might charge the battery for a little while, but once the sunlight is blocked
 by the station, the battery charge begins to drain. This causes the battery to turn off - and even when the panels receive sunlight
 again, the battery won't be sending power unless an engineer turns it on again.
If you test this yourself in-game, you will find it to be true.
So, to restate: set the SMES as shown in the image!
Wiring (Slightly Outdated)
Wiring is a bit finicky. There's a certain way to do it. Once you learn how to do it properly, it's very easy.
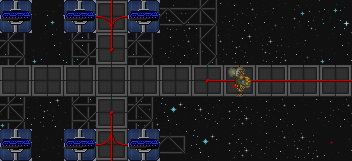
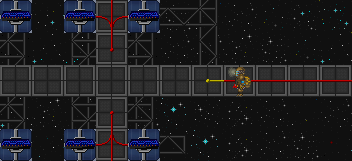
See that end? That's a knot. Knots are bad. You will want straight, clean lines.
Let's snip it with the wirecutters for now, so that we can demonstrate how to properly wire.
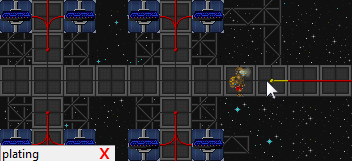
First, face where you want to place a wire. Then, with cable cord in your active hand, click in front of your character on the plating.
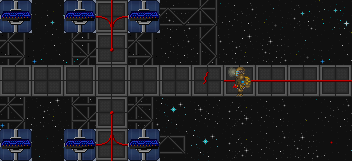
Facing the opposite direction, you will set down another wire to straighten out that knot.
Important Notes
Do NOT click the plating by accident! You will only overlap the wire with the knot at the end - you will not fix it and straighten it out. Right below your chat bar (where you type IC/OOC/etc), there is a status bar. It shows the name of anything your mouse scrolls over. Use this to your advantage to double-check yourself when wiring!
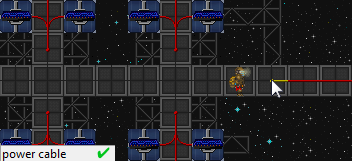
See the difference? Our cursor is on the wire, and not the plating.
Now click, and it should straighten it out.
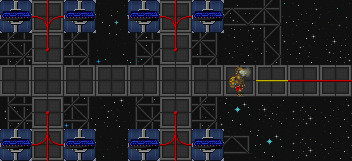
Here's a short run down of what it'll look like when you continue to wire. [1]
Keep wiring and connecting everything together, including the tracker at the end of the solar array. It's an important piece of the puzzle that controls how the solar panels track the sunlight. Nifty, eh?
You may find better ways of wiring that still work out; just make sure everything's connected correctly - without knots!
Configuring the Solars
Now that we have them all wired, it's time to set them up a bit.
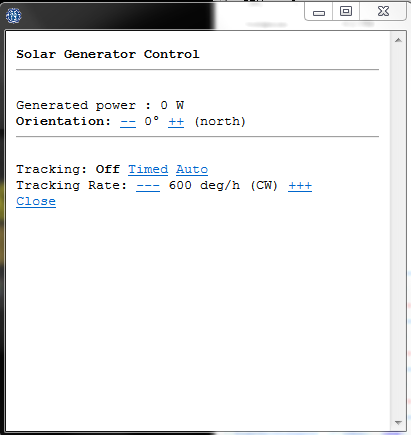
Remember that orange-screened computer we saw near the SMES? That's the solar generator console. Click on it, and a popup will appear.
It should look like the above.
Set the tracking to Auto.
Now the solar panels will automatically track the sunlight and adjust themselves accordingly.
After some time has passed, the solars will gain sunpower and charge up the SMES.
It's suggested to wait until the SMES has at least 10% charge before turning on the output.
Once the battery has some charge, you can set the output to 50,000 - 75,000 depending on how much power you need.
 (If the output load is equal to the output value you set, it means the station needs more power than it's getting. Crank it up!)
